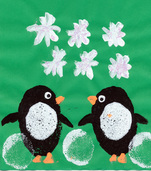
 Items Needed:* Colored paper
* White paint * Black paint * Orange paint * Potatoes or cheap sponges * Some paper plates * Paintbrush * A knife or scissors * Glitter (optional) * Hair dryer (optional) This idea came from the The Usborne Big Book of Playtime Activities although we modified it a little bit. 1. You can cut a potato in half to use as a stamp or just cut two sponges to the desired size. We used sponges and cut one large oval and one small oval (adults should do this part). 2. Squeeze some black paint onto a paper plate. Take the larger oval stamp (potato or sponge) and dip it into the paint. 3. Wipe off any excess paint on the side of the plate and then apply the stamp to the paper to create your first penguin. (My 5-year-old could do this with minimal assistance from me but an advanced 4-year-old might be able to do it without much help). 4. Repeat for the second penguin body. 5. Let black paint dry for a few minutes. You can speed this up by using a hair dryer. 6. Put some white paint on a second paper plate. Take the smaller oval stamp and dip it into the white paint and apply it to the middle of the black oval for each penguin's belly. 7. Take the paintbrush and dip it into the white paint and make a circle for each penguin's eye. Clean the brush and then make a black painted circle to make the pupils. (A young child can probably try this although my daughter wanted me to do it for her). 8. Then put the brush in the black paint again and paint the wings. A preschooler could do this. My daughter had me do the first wing, then help her with the second wing and then she did the last two wings by herself. 9. Clean off the brush and apply the orange paint to make the beak and feet. You're basically painting triangle shapes, which my 5-year-old did on her own. 10. Use the smaller oval stamp dipped in white to make the snowballs on the bottom of the picture. 11. Your child can use a finger or the paintbrush dipped in white paint to make the falling snowflakes. Have your child make a "cross" shape and then an "x" shape to make the snowflakes. For a bit of added flair, you can sprinkle some glitter onto the snowflakes while the paint is still wet.
0 Comments
 Items Needed:
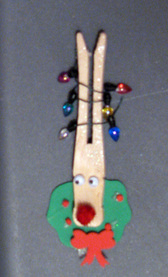
* A wooden clothespin * Pair of googly eyes * Pom Pom (red preferred) * Festive Foam stickers (we used a wreath and bow) * Holiday Light string or similar (used for miniature trees) * Glue * Glitter Glue and a paint brush (optional) This is a very simple and inexpensive craft that can be done with young kids (as long as they don't try to eat the supplies). 1. Glue the eyes and pom pom nose to the clothespin. 2. Attach the clothespin to your wreath with glue if it's not a sticker. 3. Attach the bow to your wreath. 4. Wrap the decorative string around the "antlers" of your reindeer. Apply small amounts of glue to the antlers so the string will stick to some parts of the clothespin. 5. For some extra sparkle, spread some glitter glue on the antlers and face. 6. Place your festive reindeer in a prominent location and enjoy! 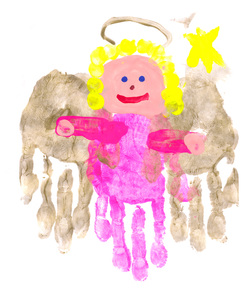 Items Needed:
* Piece of paper or card stock (white is best) - you might need a few pieces * Craft paint (gold for wings and halo, other colors optional) * Sponges (get a bunch from a Dollar Store) * Paper Plates * Paintbrush * A few disposable rags or lots of paper towels Note: I did this craft with my 5-year-old which I think is the ideal minimum age. If you try this with a younger child, I would recommend at least two adults help with this craft. This craft, based on a project in The Usborne Big Book of Playtime Activities, can be messy and a little time consuming but it is worth the effort and makes a great keepsake. 1. Start with the "body" of the angel and apply your paint color to a paper plate. My daughter chose pink. 2. Rub the sponge on the plate and wipe off some excess and then place your child's hand on the sponge to apply the paint to his or her hand (this is like having a large ink pad). 3. Firmly place your child's painted hand in the center of the paper. If you don't get it right the first time, try again with a new piece. 4. Let the "body" dry for a few minutes; take this time to wipe off the excess paint. (Note: You could do the wings first to prevent multiple hand cleanings, but you'd have to be pretty certain of your hand placements). 5. Assuming you've done the body hand print first, now apply your gold paint to another plate. Spread a sponge on the gold paint (You could use the other side of the first sponge but you will get very messy. For a cleaner option, rinse the first sponge or just use a new sponge for this color). 6. Press your child's hand onto the gold-painted sponge. Wipe off any excess and firmly apply the hand to the paper, slightly overlapping your "body" hand print. 7. Then apply your child's other hand to the gold-painted sponge (you may need to add some paint to the sponge). Press this hand to the other side of the "body." 8. Allow the paint to dry a little and wipe your child's hands off. 9. Rotate the paper so the fingers are pointed down. 10. Use a pale pink or cream paint (or whatever skin tone you'd prefer) and have your child finger paint a circle for the head and two finger prints for the hands. For younger kids, you can help guide them. 11. Dip your child's finger in whatever paint color you've chosen for the hair color and apply the hair around the head in a dot pattern. 12. Draw a face with your choice of colors for the eyes, nose and mouth. (A paintbrush might be best here and an adult might be needed for this part). 12. Use the gold paint and draw a halo. Small kids can use their finger or a paintbrush. 13. You can embellish the picture with other decorations such as stars which can be drawn with the finger or a paintbrush. 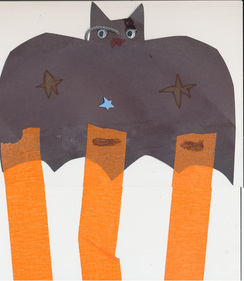 Materials Needed:
* Black construction paper * Googly Eyes * Glue * Scissors * Piece of yarn * Crayons or Markers * Party streamers (color optional) * Stickers (optional) This idea came from the Middlesex Borough Library and is a great way to get in the festive mood. 1. Draw a bat on the black construction paper (parents will need to do this for younger children). Use a template if desired. 2. Cut out the bat shape. 3. Let your child decorate the bat with markers or crayons. Stickers can be added if desired. 4. Glue on the eyes. 5. If you want, glue on as many streamers as desired. 6. Cut a small hole in the top of the bat and attach the yarn. Then hang and enjoy! 5. 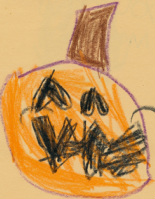 Materials needed:
* card stock, colored or construction paper * crayons or makers * photo of your child in Halloween costume * scissors & glue (optional) * stickers (optional) What better way to share the Halloween holiday with distant loved ones than a special card? Younger children might need a little help but let your child decide what the design will be. Use crayons or markers to create a Halloween scene and embellish with stickers or pasted pictures, if desired. For an extra special card, include a photo of your child in Halloween attire. 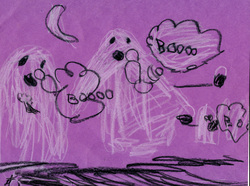 Materials needed:
* colored paper * crayons (or markers if preferred) It's such a simple idea but sometimes those are overlooked. Just get some paper and encourage your child to draw a Halloween scene. And then you can decorate your child's room or part of the house for Halloween with 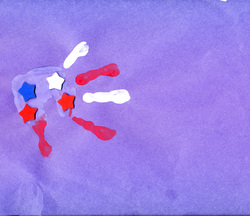 Materials Needed
* sheet of construction paper * red, white and blue paint * glue * wooden stick * optional - star stickers 1. Take a sponge or paint brush and apply different colors to your child's fingers and palm 2. Then help your child place their hand on the paper 3. When the paint is dry, apply the stickers and glue the wooden stick to the paper 4. Your flag is now complete and you have a personalized memento. Idea from the Middlesex Borough Recreation Department 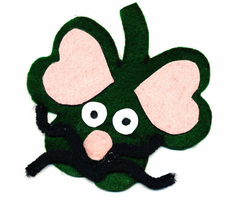 Felt Shamrock Mouse Items Needed: (see below for alternate materials) * piece of green felt * piece of pink felt * pink pom pom * googly eyes or felt or paper eyes * black yarn or pipe cleaner * craft glue * scissors * black marker * magnet (optional) Recommended for preschoolers & older (although adults will need to help with scissors for younger kids) I discovered this craft in Crafts for St. Patrick's Day by Kathy Ross and my 4-year-old and I decided to give it a try. Now, I'm often unprepared for our impromptu craft sessions so there are suggested alternatives to the items needed, depending on what you have and your child's preference. The steps for completing this project are basically the same, regardless of the materials used. First cut out a shamrock shape from your green felt (or paper, see below). If you're like me and can't really draw, you can trace a template from online and use that to cut your shape. Young children will need help cutting this shape, especially if you're using felt. Then draw and cut out the inner ears from the pink felt or paper. These are basically a heart shape. Your child can then glue the inner ears to the shamrock shape and then attach the nose. Whether you use googly eyes or make your own out of felt or paper, your child can glue those next. (Note: the larger eyes look best; we tried smaller ones and the mouse looked a bit shifty). Then glue the whiskers and your St. Patrick's Day Mouse is complete. Alternate Materials: - if you don't have felt, you can do this entire project with paper and yarn. Just use colored paper for the shamrock, eyes, nose and ears and yarn for the whiskers - if you don't have googly eyes, you can make eyes out of white felt or paper; just cut out two circles and then use a black marker to make the pupils - Kathy Ross' book called for yarn for the whiskers but my daughter wanted to use a black pipe cleaner. Just cut it to desired length, bend and glue onto the face - if you don't have a small pom pom you can cut out the nose from a piece of leftover pink felt or paper - you can turn this into a festive magnet by attaching a small magnet to the back This is your new blog post. Click here and start typing, or drag in elements from the top bar.
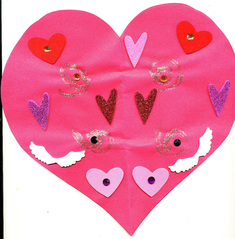 A card or decoration Items Needed: * Construction Paper (pink or red best) * Pencil * Glitter Glue (color is up to you) * Festive stickers * Scissors * Rhinestones (optional) * Crayons or markers (if you decide this is a card) Recommended age: toddlers and older can do this although with very young kids you will need to cut for them and you might want to skip the glitter glue or help apply it. Fold a piece of construction paper in half and draw half a heart shape along the fold. Cut out the heart shape along the line you've drawn. Note: If you'd like to make another craft with the leftover paper, cut out two pieces of paper and click here for more information. Unfold the heart that you've cut out. If your child wants this to be a Valentine's Day card, have them decorate and write on the inside first. When done with the inside, or if you simply want this to be a decoration, adorn the front of the heart with stickers and glitter glue. If you have rhinestones, you can place them on your heart stickers or in a variety of ways. We swirled the glitter glue on the paper but you can choose what design you'd prefer. To swirl the glitter glue, apply a small blob onto the paper and then use the tip of the applicator to "draw" the shape. When the glitter runs out, apply another blob to the end and then spread it out again. Continue until your shape is finished. A preschooler can do this with some parental guidance, depending on the shape. If you use a lot of glitter glue it can kind of warp the paper so you can either use a thicker paper or take the second cut-out heart (if you had cut a second heart) and glue it to the decorated heart.  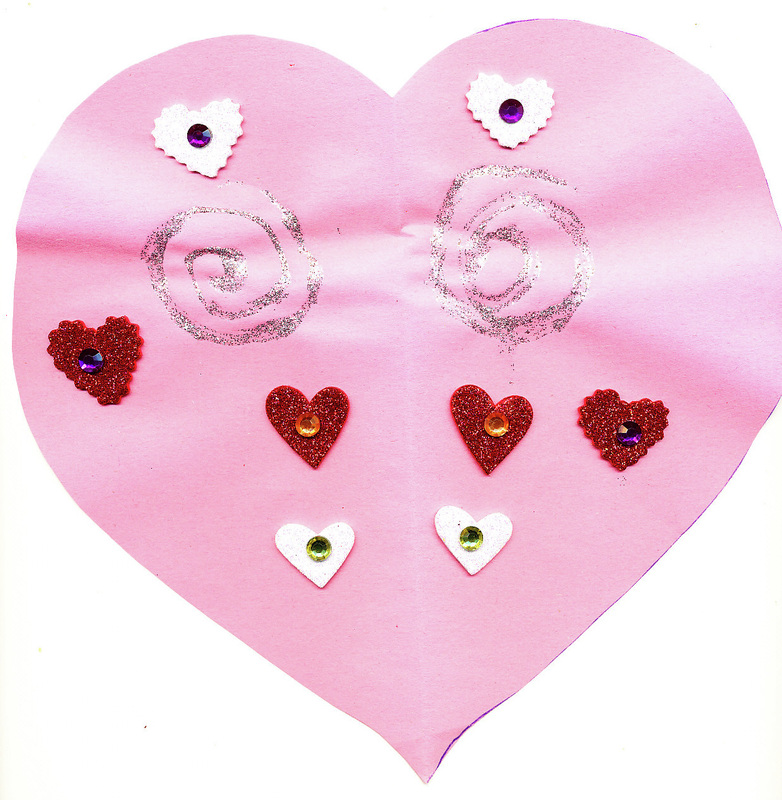 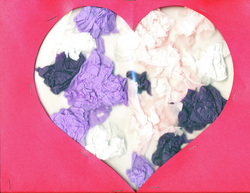 Items Needed: *Two pieces of construction paper (pink or red ideal for Valentines Day but color is your choice) * Tissue paper (more crumpled the better; colors optional) * Laminating pouches (or something similar) * Glue Stick * Scissors * Pencil * Stapler * Tape or stickers (optional) Age recommended: ideal for 4 years and older but some 3-year-olds could do with extra help If you're like me you might just be getting around to putting away your Christmas decorations and miscellaneous related items such as leftover gift wrapping. Well, I have a use for any crumpled tissue paper you might be thinking of tossing as you pack things away. Take your two pieces of construction paper and place one on top of the other. Then fold them in half. Draw half a heart on the folded paper (parents would need to help younger kids), starting at the top of the fold and curving to the bottom (see first of the photos below). Be sure to leave a little space at the top and bottom of the heart. Use your scissors to cut along the heart you've drawn (parents need to do this for younger children; see second photo below). Set aside the cut-out hearts. You can use them for another craft. Tear up and crumple your tissue paper. Your kids will love this part. If you haven't done so already, open your paper to reveal your full heart. Place a laminating pouch on top of the heart (so you can see the heart shape through the plastic) and lift the top of the pouch (like opening a book). Use the glue stick to glue a section of the pouch within the heart shape and then put the tissue paper on it. Continue until the area of the heart is as filled as you want it to be. Then place the top of the pouch over the tissue paper - your tissue paper is now sandwiched between both plastic pieces of the pouch. Place a heavy book or two (or three) on top of the laminating pouch to flatten the tissue paper as much as possible. If you have really crumpled tissue paper, it shouldn't take much to flatten it. If your tissue paper is in better shape, it might take a few hours to really pack it down. Once the paper is as flat as you'd like it, remove the books and now place the laminating pouch (filled with tissue paper) between the two pieces of construction paper. Use your stapler to attach all the pieces (parent should help younger children). If you don't want to use staples, you can use tape but staples really do hold it together better, especially near the cut out of the heart. If you don't like the look of the staples, your child can place decorative stickers over them. Now you have a great holiday decoration or gift for Mom or Dad or a grandparent! Draw and cut your heart on your construction paper. Remember to cut both pieces of paper at the same time so your hearts are the same size 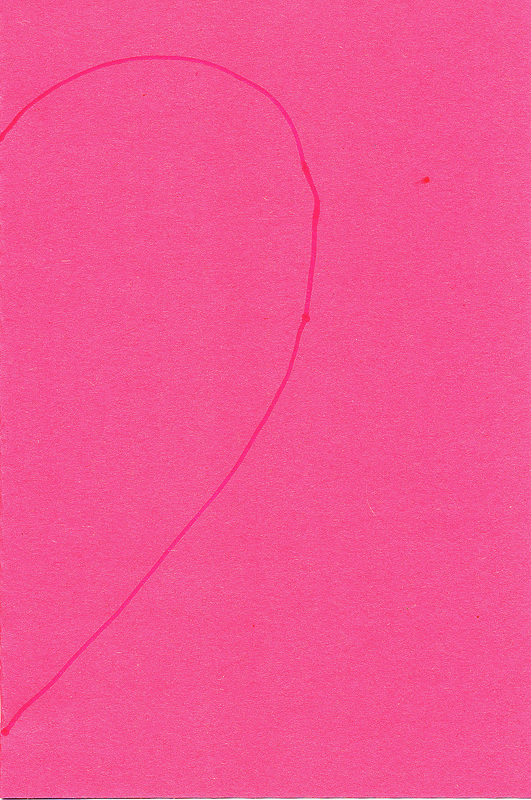 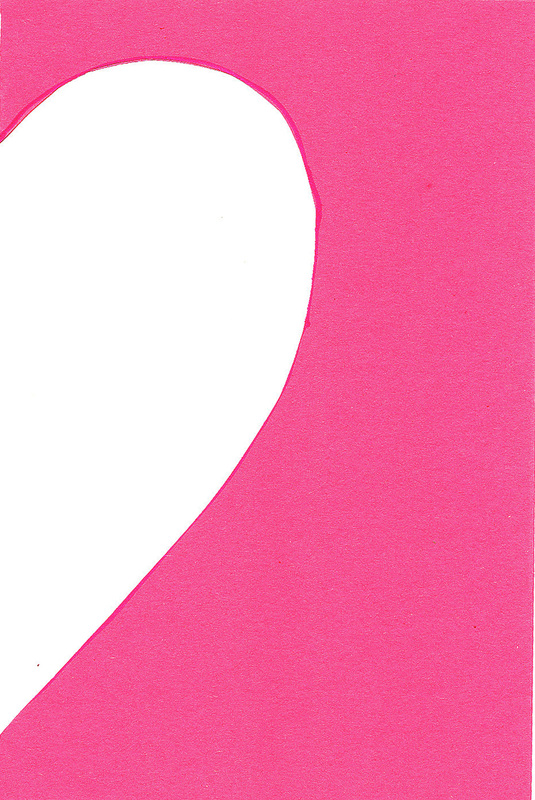 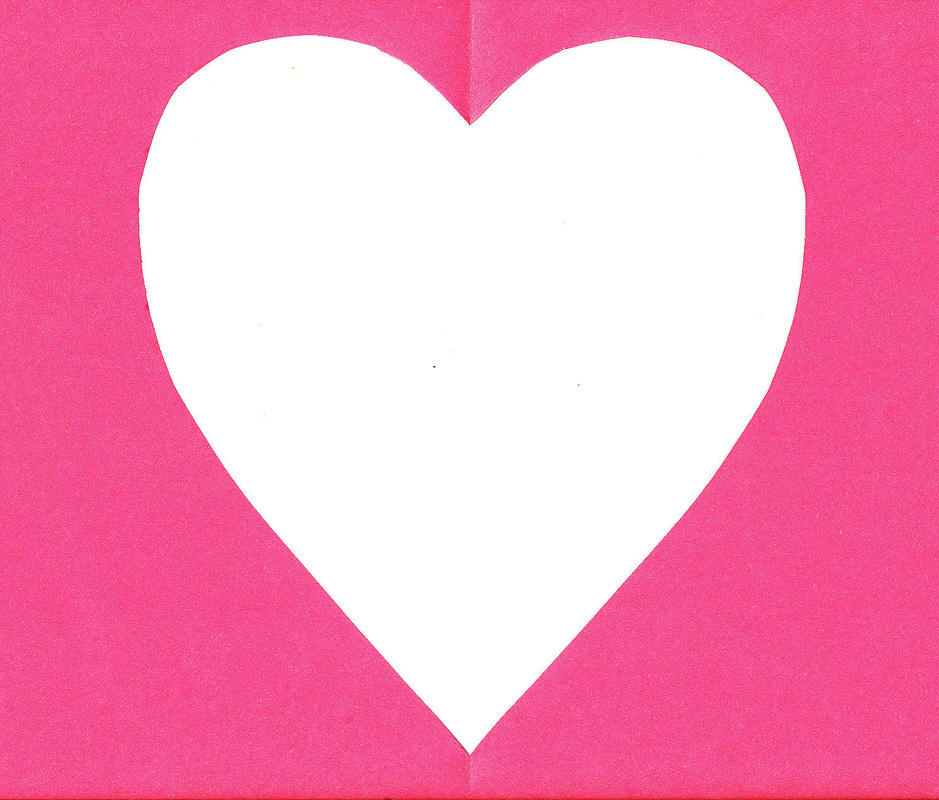 |
Categories
All
Archives
March 2018
AuthorSandra K. Lee is a freelance writer and stay-at-home mom with a 8-year-old princess & a 4-year-old superhero in Middlesex County, New Jersey.
|

 RSS Feed
