|
Items Needed:
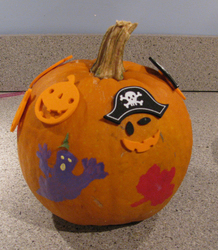
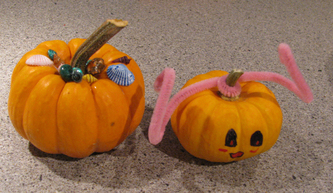
* Pumpkin * Halloween Stickers * Paint or Markers * Stencils * Pipe cleaners or ribbon (optional) * Glue and shells (or other decorative elements) (NOTE: the nature of this craft makes it better as an indoor than an outdoor pumpkin, the exception being if you only paint the pumpkin.) If you have a young child, carving a pumpkin for Halloween may not be your ideal craft project so here are some ideas for the younger set to get into the Halloween spirit. If you have stencils or want to buy them, you can find ones with Halloween shapes. This is really better for an older child of at least 5 or 6 or you can be like me and paint it for your child. You also can just let your younger child "paint" the pumpkin however they like. It likely won't be display-worthy, but your child will have fun painting it. The other option for a toddler or preschooler is to have them put stickers on the pumpkin. We got these great Halloween foam stickers from Michaels that allowed you to put masks on the foam stickers. You could also use glow-in-the-dark stickers. You also can use markers or paints to draw faces on your pumpkins as we did with one of the smaller pumpkins pictured. My daughter decided her pumpkin should have arms so we just twisted a pipe cleaner to the stem. A painted pumpkin should stand up to being outside; you could also spray seal it (outside) for added protection. And the last project is really up to what you have and the imagination of your child. We had some colored shells so we glued them to the pumpkin but you could use gems or sprinkle glitter to make unique designs. One thing you should know is that some things were too heavy to stay glued to the sides of the pumpkins so you'd need to hold them longer (not ideal when helping young children) or glue them to the top as we did or use flatter and lighter things to decorate the pumpkin's sides. Any or all of these crafts are quick, easy and fun for all ages an
0 Comments
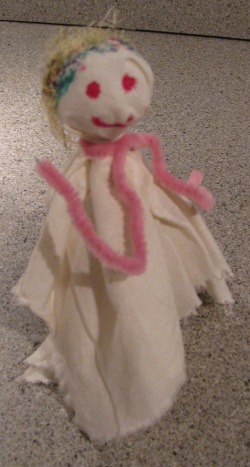 Easy craft that your child will enjoy after the craft is done Items needed: * Pipe cleaner * Piece of cloth or felt * A ribbon * Markers * Foam ball * Glue and yarn (optional: if you decide to add "hair") This is a quick an easy Halloween craft that was inspired by crafts offered at the historic Kennedy-Martin-Stelle Farmstead as part of the Somerset County Weekend Journey Through the Past. Children of all ages will like this craft and if your child is like mine, he or she will play with it after the craft is completed. It's also a great way to get rid of any fabric remnants you might have lying around. Cut a piece of cloth in a large rectangle. The exact size depends on how long you want the ghost's "train" to be. Place the cloth over the foam ball and tie the ribbon in a knot around it. The ribbon will hold the fabric on the ball; you also can use some glue to keep the fabric in place. You can cut the ribbon so it won't be seen or let it trail as a decoration. Take a pipe cleaner and twist it around the ghost's neck and then bend to make arms. Draw a face with markers (or help your child). Kids can draw or glue hair. My daughter actually drew hair and then decided to glue corn silk onto its head. Your child also can decorate the ghost's train if they want. This is your new blog post. Click here and start typing, or drag in elements from the top bar.
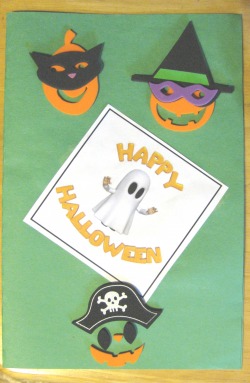 Simple craft makes a great gift for family Items needed: * Sheet of construction paper * Stickers (craft stores have great varieties) * Digital Camera * Computer and printer * Photo paper or nice card stock * Crayons, markers (optional) * Glue * Clip art (optional) This is an easy craft for all ages and makes a great Halloween gift for the grandparents. Take a sheet of construction paper (color of your choice) and fold it in half to make the card - the orientation is up to you. Take a photo of your child in costume and then print on photo paper (you can also order prints if that's easier). Let your child place stickers and clip art on the cover of the card. Craft stores such as Michaels have great foam stickers like the ones we used, which let the kids be a little more creative. But any Halloween stickers will be fine. You can find lots of free clip art on the internet and print it out, cut and paste. An older child can use crayons or markers to write "Happy Halloween" or draw pumpkins or other decorations. Glue the photo on the inside of the card and your child can decorate the rest of the inside with drawings or stickers. Let the glue dry and then it's ready to be delivered! This is your new blog post. Click here and start typing, or drag in elements from the top bar.
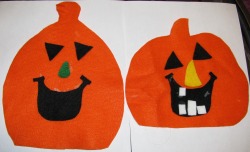 Easy Halloween craft for small kids Items needed: * Orange Felt * Black Felt * White and green or yellow felt (optional - can always skip the teeth and make nose black) * Glue * Scissors * Card stock template for pumpkin shape, his mouth and nose - see links below (can use a file folder instead of card stock; if you can draw or cut freehand, the template isn't needed) Note: if you're doing this project with a younger child, you might want to have all the felt pieces cut and ready to go. If you decide to use the template, cut out the template first and then attach it to the felt and cut around it. (You can hold the template onto the felt with your hand or pin or tape it to the felt). If you don't need the template, draw a pumpkin onto the orange felt and cut it out. Cut triangles for the eyes (can do so for the nose as well) on the black felt. If you are a little more artistic, you can make the eyes round or oval. Draw the mouth on the black felt and cut it out. If you want to make teeth, simply cut rectangles of varying sizes out of the white felt. Now your child can glue the features to the pumpkin and add teeth to the mouth if they choose. If you have a felt board, you can attach a small piece of velcro to attach the pumpkin.
Fairytale Things to Make and Do by Leonie Pratt has lots of cute ideas for crafts but some people (like me who likes crafts but doesn't always have the artistic ability to back it up) might find some of the projects difficult to reproduce.
Amazon lists the book as being for 4-8 year olds, but they will need adult supervision and, in many cases, help because scissors and glue are essential to a majority of the crafts. An adult can help three and four year olds with some of the projects, such as:
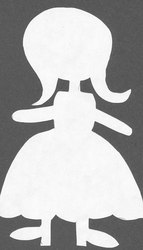
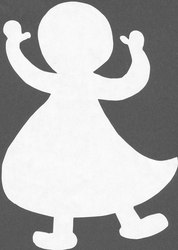
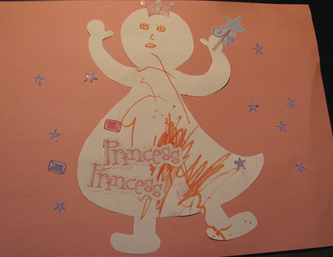
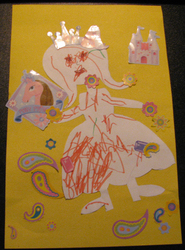
Materials needed: * card stock paper * colored paper * template (or use mine below) * scissors * crayons or markers * craft glue * stickers or glitter (optional) This craft was inspired by The Paper Princess by Elisa Kleven. You can see the finished product below the templates. This is a great, simple craft to do with your princess. You could also modify the figure for a boy. Draw an outline of a princess (to make a fairy simply add wings) on your card stock paper. You can use my template (see below) or search online for something to print and trace over (searching for princess silhouette gives some decent results). If you're drawing your own princess, don't worry if you make mistakes. Once you've drawn the outline, cut it out. This card stock princess will be your template if you ever want to do this project again. Place the template on a sheet of paper (it can be white or colored, depending on how your child wants to decorate it). Trace around your template on the new sheet of paper. Then cut it out. Let your child decorate the princess however she wants. When your child is done decorating, glue the paper princess to a new sheet of paper in a color of your choice. Once the glue dries, you can proudly display. Templates below: These are my crude attempts to draw paper princess templates. The one on the right is my version of Elisa Klevin's Paper Princess. You also can draw your own or find others online. If you use my template on the left, just be careful not to cut off her head when cutting her out; her neck is a little thin! The finished versions done by my 3 1/2 year old. After coloring and gluing she decided she wanted to add stickers.
I didn't buy enough pumpkins to try this yet, but this looks like a pretty neat idea from Martha Stewart.
If anyone does give this project a try, we'd love to hear from you. Martha Stewart's site has Halloween Central, with tons of other craft ideas includin 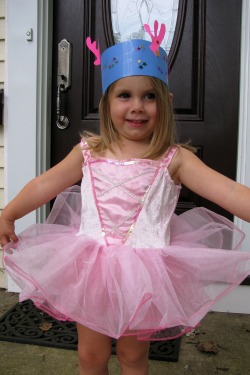 A crown fit for a princess - or prince A nice way to reinforce the letter C of the alphabet & encourage pretend play. Materials Needed: * scissors * a few pieces of different colored paper (at least two need to 8 1/2 by 11) * tape or glue (tape might hold up better) * stencils (optional) * stickers or other decorative elements (optional) * markers or crayons (optional) Take a piece of colored 8 1/2 by 11 paper and cut it in half. Then tape them together. Depending on the size of your child's head, you might need to trim one end before taping the other end to form the base of the crown. Take different colors and have your child draw (or you can draw) various shapes. The crown we made was an Ariel crown and we made squiggly coral (use the link for a template if you choose coral). But you can make anything - animals, shapes or even stencils for particular designs. Once you have them cut out, now is the time to decorate them if your child desires. You can use stickers, crayons or markers to make designs. Then glue or tape the decorations to the base of the crown. 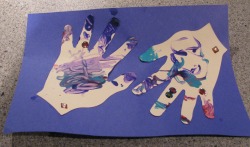 A fun & quick 'handy' project Materials needed: * Crayons or markers * paper - two different colors * craft glue * scissors * decorative stickers or gems (optional) This idea came from the Middlesex Library's storytime, with a little embellishment from me. If your child is old enough to draw, have them draw an outline of their hands or feet; otherwise, draw an outline or your child's hands. The outline would be best on white paper but the choice is yours. Then cut out the hands. Let your child decorate the hands. They can use paint or crayons or markers - or a little bit of everything. If you've decided to use some kind of decorative gems or stickers, help your child apply them to the hands. If you used paint to decorate, wait until it dries. Then take glue and apply the hands to the second sheet of paper, which will be your background. And you're done! |
Categories
All
Archives
March 2018
AuthorSandra K. Lee is a freelance writer and stay-at-home mom with a 8-year-old princess & a 4-year-old superhero in Middlesex County, New Jersey. |
||||||||||||

 RSS Feed
