 An easy craft for kids of all ages to make for Valentine's Day, Mother's Day or any other special occasion.
Materials Needed:
1. Draw a heart shape on your piece of paper or card stock. 2. Cut out your heart. 3. Use glue to attach buttons and other embellishments in pattern of your choice.
0 Comments
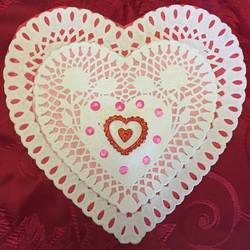 A very elegant looking Valentine's Day craft that is still very easy to make. Materials Needed:
1. Place small doily on one piece of paper and trace the doily shape. Cut out the tracing and then glue it to the back of the small doily. Repeat this step for the next doily. You can use solid or pattern paper as your background. 2. Once all doilies have been glued to their paper backgrounds, then glue the smallest doily to the next biggest doily and so on for a layered effect. 3. Decorate the front as desired. We used a foam heart sticker and then dipped a pencil's eraser in some pink paint and "stamped it in an outline. 4. Write your message on the back and/or decorate the back as well. 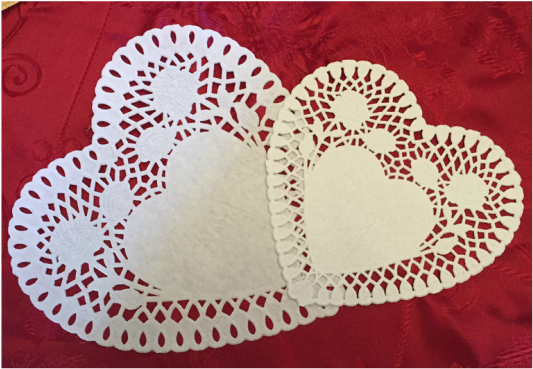 Use doilies of different sizes for your craft 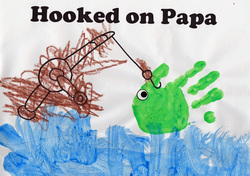 Supplies Needed:
A wonderful Father's Day craft for all ages. My son's preschool did this craft. I couldn't find the exact template so I made one with a different font for the words. You can download it here.
Here are alternatives for this craft that you can do as well:
 Supplies Needed:
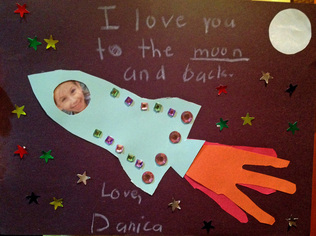
This is a great Father's Day craft that kids of all ages will enjoy. Younger kids will need more assistance but they can do it. This craft was inspired by the rocket craft from All Kids Network. 1. Print out the template from All Kids Network and cut out (or have your child cut) the rocket ship and moon. I would have an adult cut the circle in the rocket to accommodate the photo. 2. Trace your child's hand (older kids can do this themselves) - one hand on orange paper and one hand on red paper. Then cut them out. 3. If you don't already have a photo on hand, then print one out. 4. Cut the photo to the proper size and tape it in position to the back of the rocket. 5. Have your child position the hands the way they want to look like flames. You may want to cut off the thumb at least, if not the thumb and pinky, to make it look right. You can tape the flames to the back of the rocket and then glue the whole thing to the paper but it seemed unwieldy for my younger child. We found it easiest to position the rocket and flames where you want and then glue the flames in place on the paper and then glue the rocket. 6. Have your child write a message. In my 3 1/2-year old son's case, we shortened the message from "I Love you to the moon and back" to "I (heart) you" with a heart sticker because he can't write very well - see picture below. 7. Glue the moon. Place the star stickers where desired. 8. Decorate the rocket. My kids both chose self-adhesive gems but you can use any kind of foam or regular stickers or even draw a design. With my preschool-age son, we used the larger gems because they were easier for him to handle and place on the rocket all by himself. My elementary-school daughter had the dexterity to use the tiny gems. 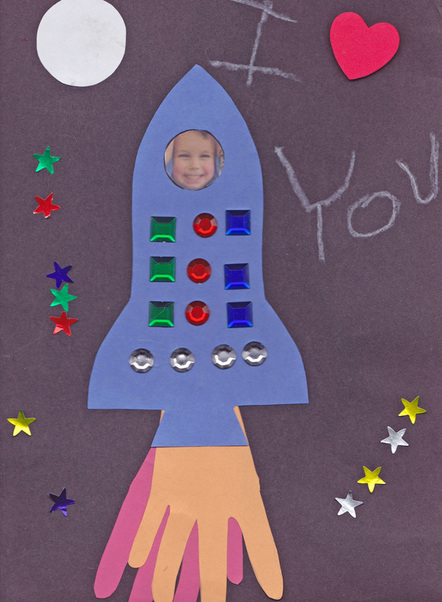 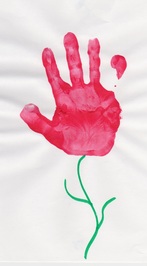 Supplies Needed:
This is one of the easiest crafts we've ever done and makes a wonderful keepsake. I find using a sponge and paper plate for handprints is easiest but you don't have to do it that way. 1. Pour some paint on a paper plate and then dab the paint with a sponge (I get them at the dollar store). 2. Wipe off globs so you have an even covering on the sponge. Then blot the sponge on your child's hand. Or flip the sponge over on the plate (where there is no paint) and have your child place their hand on the sponge. 3. Have your child place their painted hand on the paper. (For younger children, you will need to guide them). 4. Then use the marker to draw a stem and, if desired, leaves. 5. Let dry. Then you have the perfect gift. 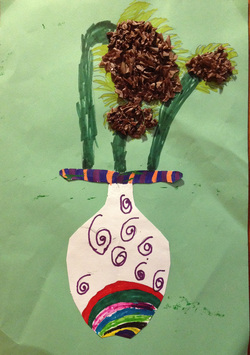 Materials Needed:
1. Draw the vase on the white paper and cut it out. 2. Glue the vase to the colored paper. 3. Draw stems and leaves for your flowers. 4. Crumple tissue paper and glue the clumps to the tops of the stems. 5. Add any other touches to the flowers as desired. Decorate vase as desired. 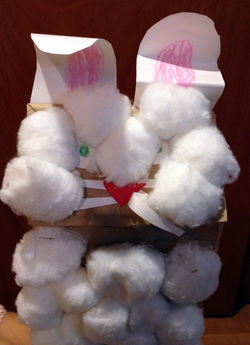 Materials Needed:
A cute and inexpensive craft for all ages. 1. Draw circles on white paper for the eyes and then cut them out. 2. Cut a few strips of white paper which will be your whiskers. 3. Draw and cut out the ears. Cut out the nose. 4. Color the eyes and ears. 5. Glue the eyes, nose and whiskers on the top part of the bag. 6. Glue the ears to the back of the bag so they stick out from the top. 7. Glue the cotton balls all over the face and front of the bag. Save one cotton ball for the tail in the back! 8. Let it dry and then your bunny is ready for fun! 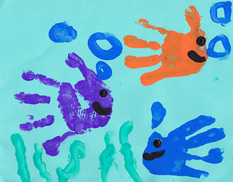 Materials Needed:
This is a great keepsake craft to give as a gift for Father's Day or a birthday or just because. There are other ways to apply handprints with paint but this is the way I prefer for slightly less mess. 1. Take first color of paint and put it on a paper plate. Use a paint brush or a sponge to apply the paint to your child's hand. Don't put too much on - just enough to cover the hand. 2. Help your child place their hand on the paper sideways. 3. Repeat with another color. (If you have more than one child, have each one do a handprint) 4. When all your fish are applied. Use your child's finger to make the bubbles, seaweed and eyes and mouths. I almost always have left over paint after a craft like this. Instead of just tossing it, I let my kids mash their hands in the remaining paint to make their own crazy paintings (they often mix the colors together). Their work is not usually frame-worthy but they have fun and I feel less guilty about tossing the paint. 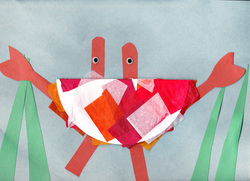 Materials Needed:
1. Draw the eye stalks and the legs. The eye stalks are basically rectangles with a rounded top and the legs are rectangles. 2. Draw the claws. 3. Cut out the pieces and set aside. 4. Take the white paper plate and fold it in half. 5. Glue the plate - open part facing the bottom of the paper - to the blue construction paper. 6. Glue the stalks, claws and legs. 7. Glue the eyes. 8. Draw and cut blades of grass and cut them out. 9. Glue the grass onto the blue paper. 10. Glue and place the tissue paper on the paper plate. Open the plate (inside the crab's mouth) and glue tissue paper inside. 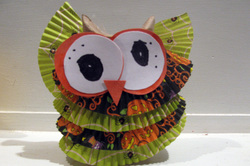 We got the idea for this craft from Family Fun Magazine's project: Give a Hoot (in the October 2012 issue). My 6-year-old and I did vary from the instructions to make our own owls. We started with a regular owl (seen at left in the bottom photo) but our cupcake liners were smaller than I'd realized and didn't give full coverage. So for the next owl (at right in the bottom photo), we cut out the bottom of the cupcake liners and stretched them over the cardboard roll. The benefits to this were: no need for glue and a fuller affect. The downside was it was a little more difficult to attach the wings better. My daughter also gave her own touch to this owl by decorating the wings. Then we decided to get really festive and used Halloween cupcake liners for the last owl (top picture). I didn't like how the wings came out (I found it much harder to properly attach liners as wings than using the card stock) but this was my daughter's favorite one. It took about 1.5 hours for us to make all three. I had to help with a lot of the cutting and some gluing but an older kid won't need as much help. My daughter had a great time creating the looks before assembly and wants to make even more to decorate our house this fall. See more Halloween craft ideas here. 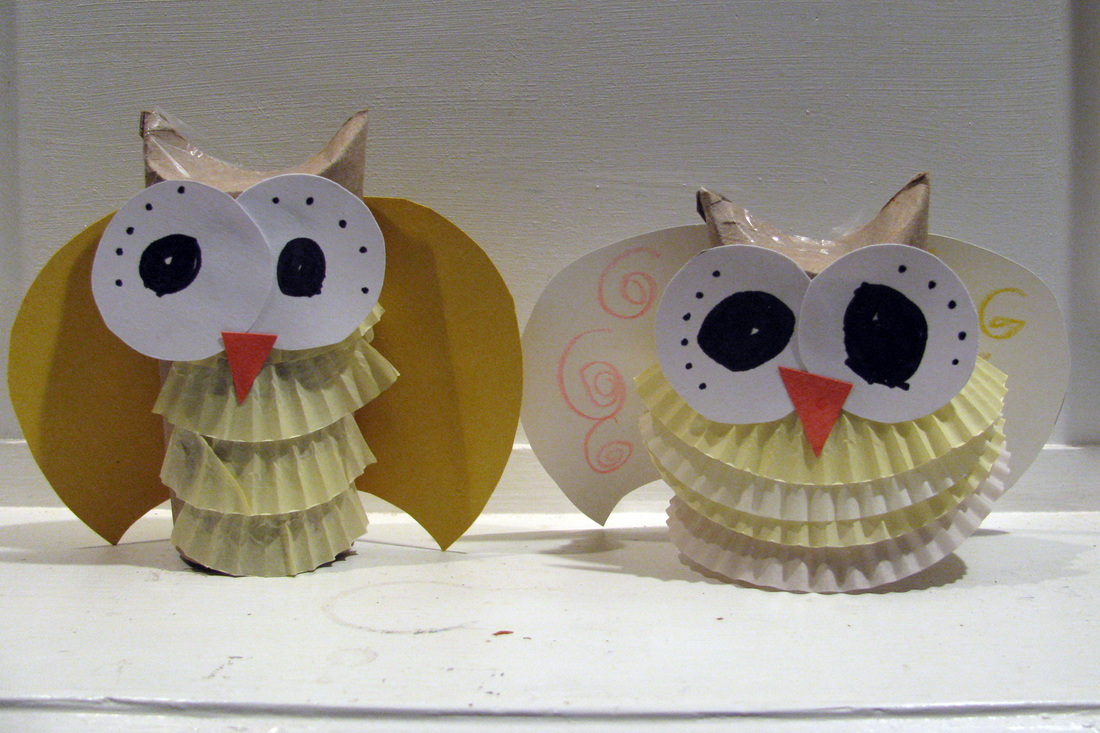 |
Categories
All
Archives
March 2018
AuthorSandra K. Lee is a freelance writer and stay-at-home mom with a 8-year-old princess & a 4-year-old superhero in Middlesex County, New Jersey.
|

 RSS Feed
