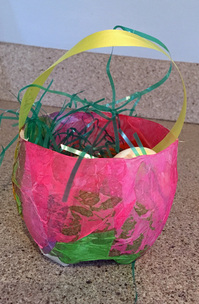
 Materials Needed:
This idea came from North Branch Preschool and is a great way to show off your colored Easter Eggs (to learn what to do with leftover dye and egg shells, visit here). 1. Have an adult cut the bottom of a rinsed-out soda bottle. 2. Cut or tear tissue paper into small squares 3. Mix glue and water in bowl. 4. Place a piece of tissue paper on your bottle (it's easier if it's upside down) and brush on some of the glue/water mixture. Repeat until the entire "basket" is covered. 5. Let dry. 6. After it dries, use a stapler to attach the ribbon (parents might want to do this). Be sure to use a strong ribbon that won't fray. 7. Add your grass. Now your basket is ready for Easter eggs!
0 Comments
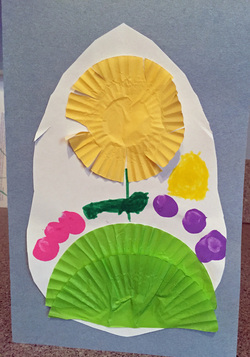 Materials needed:
This idea came from North Branch Preschool and is a great craft to help toddlers and preschoolers with their fine motor skills. 1. Fold your construction paper in half to make a card. 2. Cut out white paper in an oval or egg shape. 3. Take green cupcake liner and cut in half. Glue two pieces at bottom of white paper. 4. Draw a stem from the green liner. 5. Glue the other cupcake liner to the top of the stem to complete your flower. 6. Have your child dip his or her finger in paint and apply to the paper to make eggs. We chose pink and purple but any colors will do. 7. Use markers to make leaves or a sun, if you wish. 8. Glue entire piece to the front of your card. 9. Have your child write or decorate the inside of the card as desire.
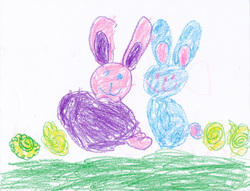 Supplies Needed:
I was inspired by some of the crayon crafts in The Usborne Big Book of Playtime Activities and Usborne's I Can Draw Animals. I did this with my preschooler (4-5 yrs old), basically guiding her but she drew everything in this picture herself. Depending on your child's ability and attention span, it may take a few practices to get a picture like this. That's ok. 1. I asked my daughter to draw circles to make the faces first. Then I suggested she make ovals for the ears and for the inside of the ears. 2. For the bodies, I suggested circles or ovals. As you can see the purple bunny isn't really either shape, but it still looks cute. We kept it simple by adding a circle for the tail. 3. Then she added grass by scribbling in green. 4. Then she made shrubs by drawing swirls in green and yellow. There is a great app called Squiggles (from Lazoo) for teaching young kids to draw swirls and other shapes. 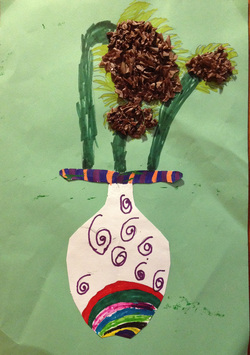 Materials Needed:
1. Draw the vase on the white paper and cut it out. 2. Glue the vase to the colored paper. 3. Draw stems and leaves for your flowers. 4. Crumple tissue paper and glue the clumps to the tops of the stems. 5. Add any other touches to the flowers as desired. Decorate vase as desired. 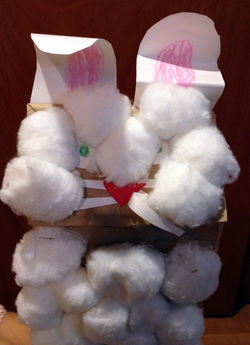 Materials Needed:
A cute and inexpensive craft for all ages. 1. Draw circles on white paper for the eyes and then cut them out. 2. Cut a few strips of white paper which will be your whiskers. 3. Draw and cut out the ears. Cut out the nose. 4. Color the eyes and ears. 5. Glue the eyes, nose and whiskers on the top part of the bag. 6. Glue the ears to the back of the bag so they stick out from the top. 7. Glue the cotton balls all over the face and front of the bag. Save one cotton ball for the tail in the back! 8. Let it dry and then your bunny is ready for fun! |
Categories
All
Archives
March 2018
AuthorSandra K. Lee is a freelance writer and stay-at-home mom with a 8-year-old princess & a 4-year-old superhero in Middlesex County, New Jersey. |

 RSS Feed
