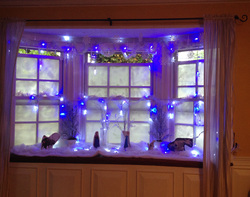
 This Disney Frozen landscape was a lot of fun to put together and a great addition for my daughter's Frozen Birthday Party and took about two hours to put together. One note, it is very difficult to find snow or winter items in the off-season (our party was in May) or very expensive. I was lucky to borrow several items from my mother's decoration stash and from my own holiday decor. However, she only had one can of fake snow spray. I had enough for these windows but ran out for the other windows in the room. There are several homemade alternatives such as using icing, which did look like snow, but I didn't want to attract ants. I chose to use toothpaste instead and no one noticed the difference in the windows. Big tip: If you use toothpaste, do it at least the night before a party because the entire room will smell like mint. 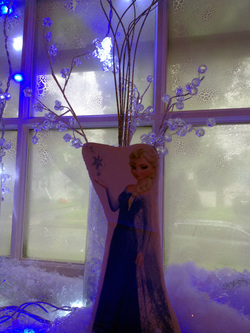 These Frozen figures really were a hit and accented the winter scene nicely. It took about an hour for me to make them. I found pictures of all the main characters and printed them out on white paper. I cut out the shape and then traced it onto cardboard (I used the box all my goody bag items came in - recycling at its best!). Then I cut out the cardboard (in the same shape as the paper picture). And then I used a glue stick to attach the paper picture to the cardboard. I took a small piece of cardboard and taped it to the back to stand it up. I also used stuffing to help the figures stand in the "snow." 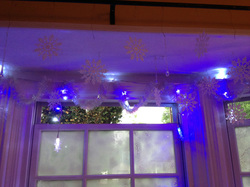 The rest of the scene took about 1 hour for my mother and I to create. I used fake snow spray on the windows. We strung a wire across the top and hung glittery plastic snowflake decorations (using wire) . We strung two strands of snowflake lights but you could also use icicle lights. The crystal trees were fake decorations that can be found in craft stores like Michaels. Some were placed in glass vases filled with plastic crystals. 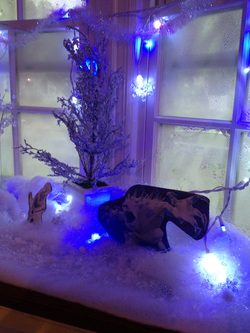 The snow along the bottom was simply stuffing that we rolled out. Then we glammed it up with fake snow shavings, small plastic glittery snowflakes and irridescent stuffing (kind of like what you'd use in an Easter basket). The glass tree looks ice-covered. My mother found them at a store a while ago, which was lucky for me but you can find something similar at a craft store. The windows were "frosted" with fake snow spray. There are other homemade options including using toothpaste or white icing.
0 Comments
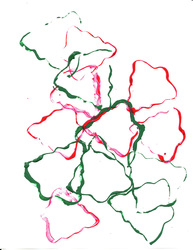
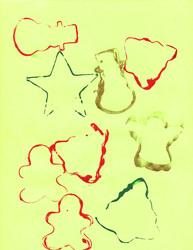
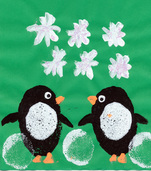 Items Needed:* Colored paper * White paint * Black paint * Orange paint * Potatoes or cheap sponges * Some paper plates * Paintbrush * A knife or scissors * Glitter (optional) * Hair dryer (optional) This idea came from the The Usborne Big Book of Playtime Activities although we modified it a little bit. 1. You can cut a potato in half to use as a stamp or just cut two sponges to the desired size. We used sponges and cut one large oval and one small oval (adults should do this part). 2. Squeeze some black paint onto a paper plate. Take the larger oval stamp (potato or sponge) and dip it into the paint. 3. Wipe off any excess paint on the side of the plate and then apply the stamp to the paper to create your first penguin. (My 5-year-old could do this with minimal assistance from me but an advanced 4-year-old might be able to do it without much help). 4. Repeat for the second penguin body. 5. Let black paint dry for a few minutes. You can speed this up by using a hair dryer. 6. Put some white paint on a second paper plate. Take the smaller oval stamp and dip it into the white paint and apply it to the middle of the black oval for each penguin's belly. 7. Take the paintbrush and dip it into the white paint and make a circle for each penguin's eye. Clean the brush and then make a black painted circle to make the pupils. (A young child can probably try this although my daughter wanted me to do it for her). 8. Then put the brush in the black paint again and paint the wings. A preschooler could do this. My daughter had me do the first wing, then help her with the second wing and then she did the last two wings by herself. 9. Clean off the brush and apply the orange paint to make the beak and feet. You're basically painting triangle shapes, which my 5-year-old did on her own. 10. Use the smaller oval stamp dipped in white to make the snowballs on the bottom of the picture. 11. Your child can use a finger or the paintbrush dipped in white paint to make the falling snowflakes. Have your child make a "cross" shape and then an "x" shape to make the snowflakes. For a bit of added flair, you can sprinkle some glitter onto the snowflakes while the paint is still wet. 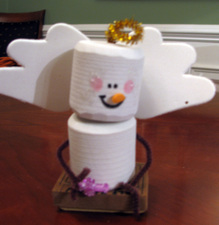 Items Needed: * Foam, round blocks * White foam sheet * Gold pipe cleaner * Brown pipe cleaner * Tiny pom pom * Piece of foam block * Miniature ornament * Glitter Glue * Marker * Scissors * Craft glue Note: For more of a winter feel, don't apply the wings and halo. 1. Cut the foam block in a square to be about a 1 1/2 inches square. (No need to cut if you find a block the right size). 2. Draw a face on one of the white foam blocks and glue on the nose. 3. Glue the blank, white foam block to your foam base and then glue the second white foam block (the one with the face) to the first one. 4. Cut out a wing shape out of the foam sheet and then glue it to the back of your snowman. 5. Take the gold pipe cleaner and insert it into the top of the foam block and then bend into a halo shape. (Cut it to size, if necessary). 6. Cut the brown pipe cleaner into two pieces. Insert each piece into either side for the arms. 7. Attach the miniature ornament to one of 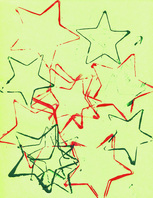 Cookie cutters for creative designs Items Needed * Cookie cutters (can use one or several) * Paint (variety of colors optional) * Tray or paper plate for each color * Paper This craft was initially done by my 4-year-old daughter for Veteran's Day through the Middlesex Recreation's Pre-K Art Program. At that time, they used red and blue paint and stars but I thought this could easily be adapted for Christmas or as a general craft. The image of the stars was done on green paper and we used green and red acrylic paint. I poured the paint into separate plates and she dipped the cookie cutter star into the paint and then applied it on the page. She did a few different ones, experimenting with different shapes and overall designs. For the last piece, she dipped the cookie cutter into one paint color and then the next and then a third paint color before applying it to the paper. The effect was kind of neat. Personally, I think the star and tree shapes worked the best, especially when she tried overlapping them but it's really whatever your child enjoys. This can be a fairly quick and easy craft for you child to enjoy the holidays or for any occasion (depending on your choice of cookie cutters) and can even be a gift or stocking for Mommy or Daddy or grandparents. Below you'll see two more options. On the left we used a white background and my daughter chose a tree cookie cutter in red and green. On the right is a green paper background and she used multiple shapes and mixed the colors. The angel and snowman look "thicker." She actually meant to do that; she placed the shape on the paper and held it there and then gently pushed it along the paper about a centimeter to create a kind of shadow effect. Sometimes it looked cool and other times it looked like a mistake. An older child might have more patience 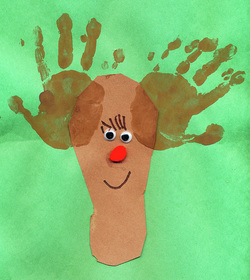 Items Needed: * Two pieces of construction or copy paper of different colors. One should be brown. The other, for the background, can be any color * Paint - brown was used here but any color is fine * One small pom pom * Craft glue . * Paper plate or tray (sponge optional) * Googly eyes * Black marker * A pencil * Scissors This gift was made by my preschooler at the Middlesex Recreation Department's Pre-K art class for the Christmas holiday and I think this would make a great keepsake gift for the grandparents or other relatives. You could probably do this with an older toddler but it could take a few tries to get the hands right. Take your brown piece of paper and have your child place his foot on it and use your pencil to trace around it. Cut out the traced foot (an older child can do this; otherwise the parent should). Glue the foot tracing to the background paper. Put paint on your paper plate or tray. You can have your child place their hand directly into the paint or use the sponge, which I think is easier. You can use the sponge one of two ways: dip the sponge into the paint, wiping off the excess, and have your child firmly press their hand into the sponge or use the sponge to wipe the paint onto their hands. Once the paint is on their hands, help them place each hand on the paper to make the antlers. I strongly recommend you do one hand at a time. You can do the facial features before the antlers so your last step is clean up, but I think the hand placement could determine where the eyes, etc go so I chose to do it first. If you do the hands first, you'll want to take a minute to clean their hands and then glue the eyes and the nose. Depending on the age of the child, they can draw eyelashes and a smile or the parent can do it. Sign your artist's name (or they can do it) and you have a wonderful crafty holiday gift. |
Categories
All
Archives
March 2018
AuthorSandra K. Lee is a freelance writer and stay-at-home mom with a 8-year-old princess & a 4-year-old superhero in Middlesex County, New Jersey. |

 RSS Feed
