 Items Needed* Clay that can be baked (color optional; amount depends on the size of the hand) - note alternate materials below * Baking pan * Tin foil * Clay knife or similar utensil * Rolling pin for clay * Depending on your child's age, an additional adult can be helpful * Ribbon if you want it to be an ornament * Access to an oven It's not terribly expensive to buy a hand print ornament kit (the average price is $10), but you can do it for a fraction of the cost on your own, especially if you want to make more than one. In addition to making a hand print ornament as a gift for the grandparents (great for your baby's first Christmas) you can make your own hand print keepsakes inexpensively as your child grows. Knead the clay and then roll it out onto your pan. I've done this several times so I actually have an old baking pan I use specifically for baking clay items. If you don't have a pan like that, then line it with tin foil and place your clay to be baked on top of that. Roll the clay out to about 1/4 inch thick or so. You can make it a little thicker if in doubt. Roll out enough to have space around your child's hand. Sometimes if you flip it over the underside is smoother looking. Then have your child place - or help them place - their hand roughly in the center of the clay and push down. If the child is 3 or younger, you'll want to try and hold their hand down for a few seconds and gently push each digit into the clay just to be sure you get a full impression (of course your child's age, squirm factor and general attitude will play a large part). Then try to pull your child's hand straight out (note some younger kids will instinctively curl their fingers so pulling the hand back quickly helps avoid this). If you don't like the impression, pull it off the pan, roll it into a ball and re-roll it for another try. If you do like it, then cut away any excess clay with the knife to make it a circular or oval shape. You can also use a clay tool or even a push pin to carve your child's name and/or the year. Also use the knife or clay tool to cut a small hole in the top for your ribbon later. Cook it in your oven to the temp and time frame recommended on the clay package. Once it's cooled, tie your ribbon. For an extra creative boost, wrap your gift in hand print paper. Other tips and ideas: * If you want to have keepsakes of your child's growth, buy the air-dry or baking clay in different colors and you can do their hand and foot prints at different milestones - 3 months, 6 months, 9 months, 1 year and so on. At the two-year mark, I did my daughter's hand impression for that milestone, 2 1/2 and 3 years and then switched to paint hand prints as they're easier to store. * If you use the air-dry or baking clay in colors instead of plain white, then buy at least two packs per color. I liked using a different color for each milestone (ie blue for 3 months, then green for 6 months) and as your child grows, you will need at least 2 packets (if that's how you buy the clay) for one hand or foot. You can buy white in a big box but be sure to put the excess in a zip lock bag or it could dry out before you're ready to use it again. * You can get a shadow box to display the prints or just keep them in a nice decorative box. You can also mount them on a wall or place on a decorative shelf. A note on alternate materials:
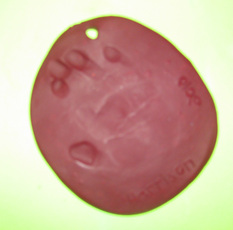
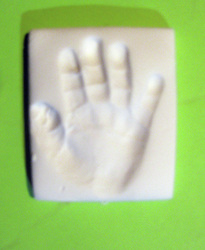
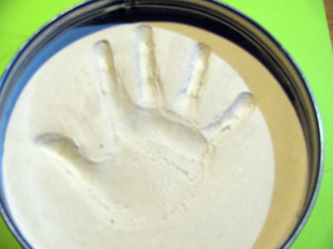
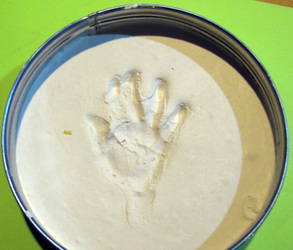
You have some options in materials for this craft, especially if it doesn't have to be an ornament. They all have their pros and cons, see below. Air-dry or baking clay are probably the least expensive (for the amount you get for the money) and for color options. Air-dry clay is nice because it avoids the oven but I've found that it doesn't hold up as well over time. If it's just a fun craft then it doesn't matter but if you're thinking of a keepsake or holiday gift for the grandparents, it's probably worth the extra effort for the more durable baking clay. The baking clay can be tough to work with in that it really takes a strong hand to initially mold and roll it out. It also can be tough at times to get a good impression if you can't really push hard (more of an issue with a younger child). I've also noticed some colored clay has left a residue on the hand. It has easily washed off but just something to be aware of if you're doing this with an infant. There is a type of air-dry "foam" material (that's what it feels like; most companies call it "impression material") that really gets a good impression and is non-toxic and doesn't leave a residue, making it ideal for infants. However, it has its own issues. First of all, it is usually more expensive and is most often sold in keepsake kits. It also can be incredibly difficult to roll it out without it sticking to everything or having it pick up every little texture. IWe couldn't use a rolling pin to roll it out because it kept sticking to it and when I tried plastic wrap it actually created swirls in the clay. Finally I rolled it into a ball and placed it on a tin foil sheet. Then I took a book and put it in a zip-lock bag and smoothed it out so there would be no creases. I placed the the book on the ball of clay and pressed down until it was about a 1/2 inch thick. Then my husband and I placed our infant son's hand in the mold. So the initial set up was way more involved but I have to say the final impression was probably the best. There also is plaster that you can buy in kits. My mom has found them pretty cheaply so this could be a great budget craft but this was the messiest of the three materials. You basically mix the plaster and some water in a bag and knead it until it has a toothpaste consistency. Then you pour it into a mold or tin (most kits include the tin) and you wait several minutes until it dries slightly. The neat thing about this one is if you mess up, you just tap the tin and the impression disappears and you can easily try again. Just don't knock it once you have one you like. Besides the slight clean up factor, the downside to this material is that it takes the longest to dry and is not going to work if you want to make an ornament. Photo Above: Craft clay that is baked in the oven (the photo doesn't quite represent it well). Photos Below: The one on the left is the "impression material" while the middle and right one are the plaster.
0 Comments
Your comment will be posted after it is approved.
Leave a Reply. |
Categories
All
Archives
March 2018
AuthorSandra K. Lee is a freelance writer and stay-at-home mom with a 8-year-old princess & a 4-year-old superhero in Middlesex County, New Jersey. |


 RSS Feed
